Obtaining the Google Index API JSON Key
(The process typically takes about 3 minutes)
If you are looking to use the Google Indexing API for immediate URL indexing, you are in the right place. This API has proven highly effective for indexing URLs and Google encourages the use of this API for such time-sensitive content. However, there is no stringent verification process, allowing for broader usage—proceed with caution.
Here are the steps to acquire the necessary Google Indexing API key for instant indexing.
1. Create a project in the Google Cloud Console (if not already existing)
Visit Google Resource Management and establish a project (if you do not have one already).

2. Activate the Indexing API
Navigate to the API Enablement Page and proceed to finalize the settings using the default options.

3. Access the service accounts page and select your project
Proceed to the service accounts page and choose your project. (Project may not appear right away in list, changes may take 1-2 minutes)
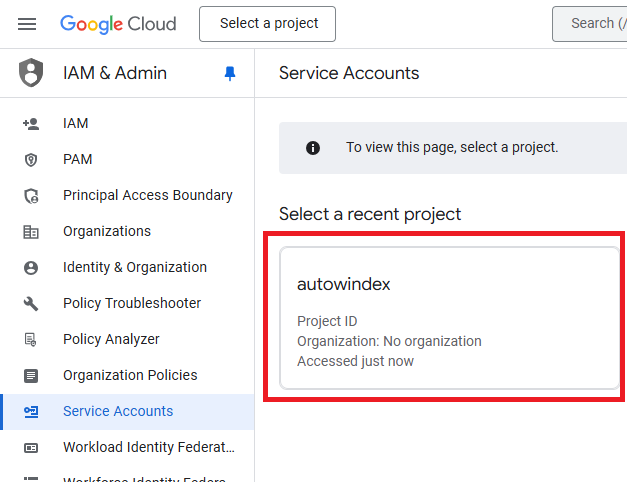
3a. Establish a service account
Use the ellipsis dropdown menu to select "Create a service account".

3b. Complete the service account form and preserve the email address
Upon selecting "Create a service account", you will be directed to a form. Assign a name to the account and remember topreserve the email address as it will be essential in subsequent steps. You may finalize the form using the preset values.

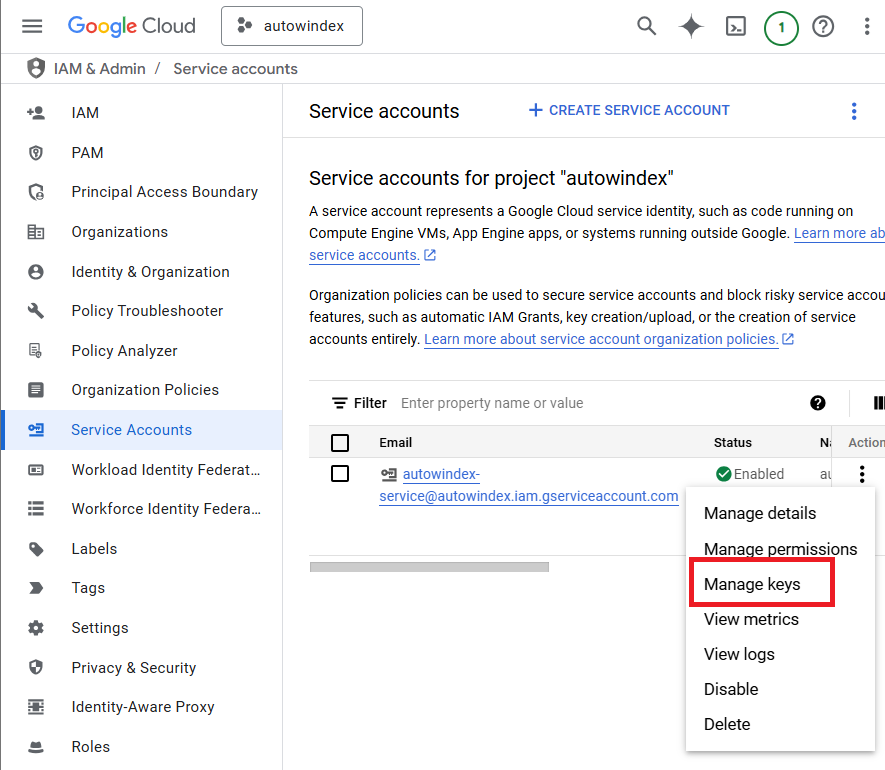
4. Locate the newly created account and select "Manage keys"
After completing the previous steps, you will be redirected to the list of service accounts. Identify the newly created account, select the ellipsis, and choose "Manage keys".
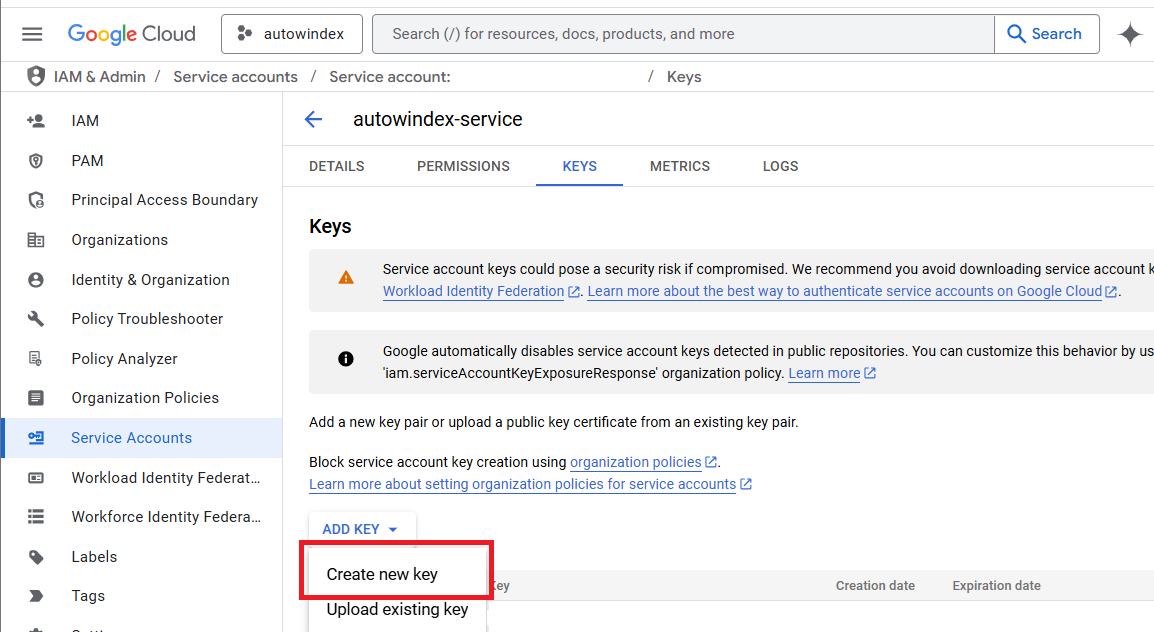
5a. Add a new key
Select "Add Key" followed by "Create new key".
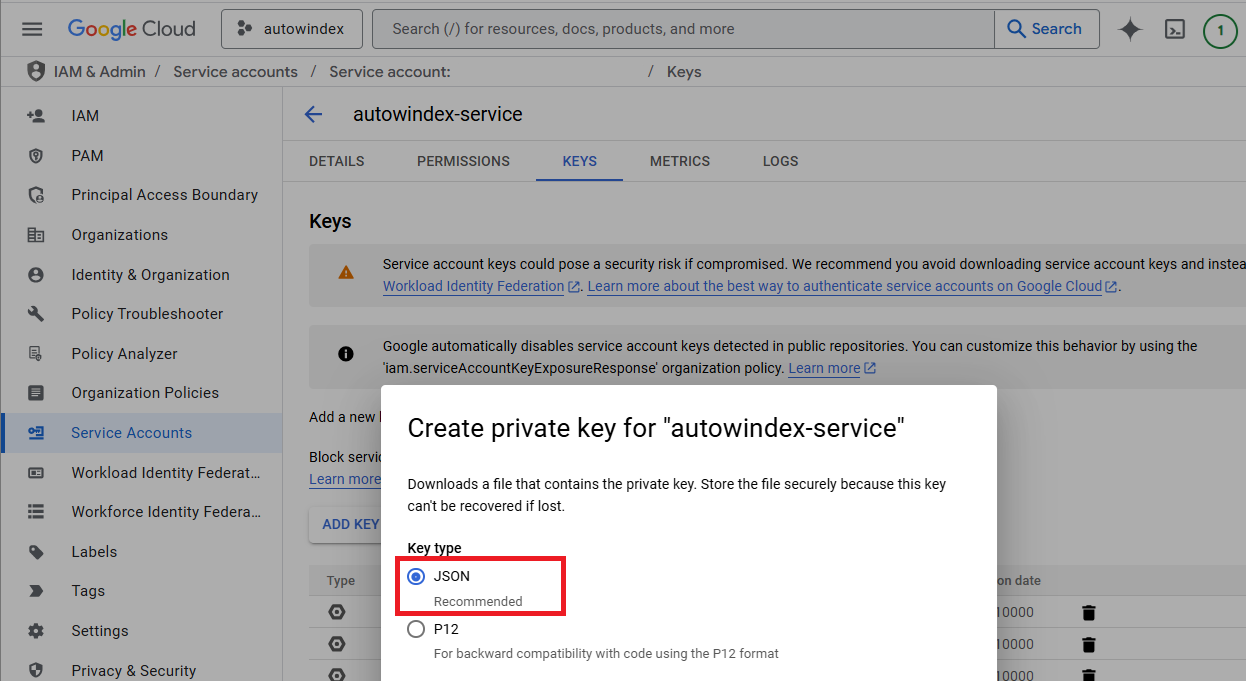
5b. Conclude key creation
Following the addition of a new key, ensure that JSONis selected, then proceed through the prompts to download the JSON file. This file is the desired JSON key, but additional steps are necessary.
6a. Proceed to Google Search Console
Navigate to Google Search Console
6b. On the left-hand bar, select "Settings"
6c. Choose "Users and Permissions"

6d. Click "ADD USER"

6e. Insert the previously saved email and confirm owner permissions
Enter the email address from the service account you documented earlier. Ensure the permissions are set to "Owner".
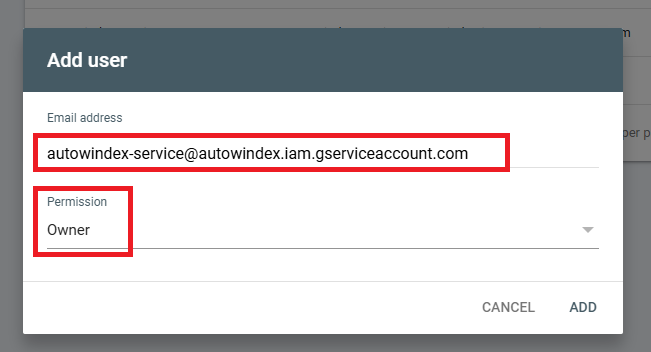
6f. Click "Add" - You have completed the Google Search Console setup!
7. Upload your JSON key to AutoWindex
Now that you have your JSON key file and have set up the necessary permissions, you can upload your key to AutoWindex. Simply click the upload button in the settings page and select your downloaded JSON key file. Our system will validate your key and enable Google indexing features for your store.
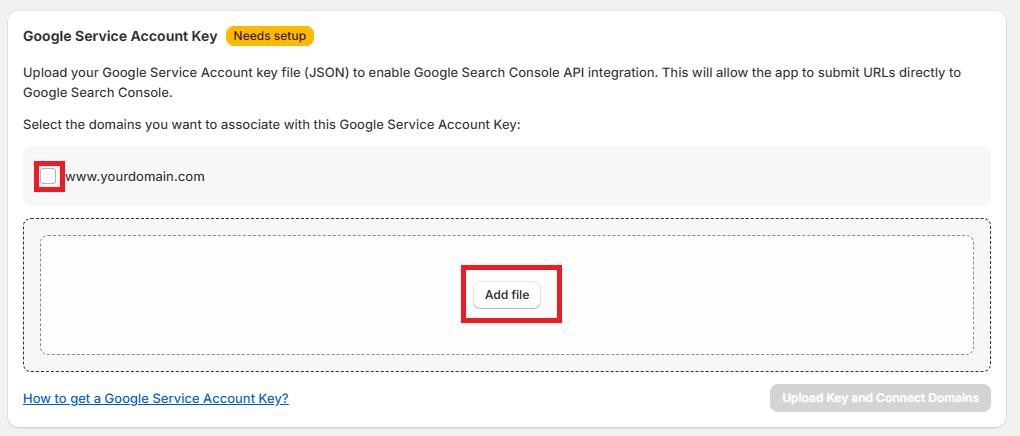
It generally takes between 3 to 5 minutes after enabling the indexing API for the process to complete. If you encounter an error while uploading the key, wait a few minutes before trying again. Should the issue persist, verify that all steps have been followed correctly. Additionally, our support team is available to assist you.